Congratulations on your new home! That exciting “fresh start” feeling begins with one crucial task: ensuring every corner is truly clean.
Table of Contents
This isn’t about a quick wipe-down. This guide is your complete, tactical blueprint for how to deep clean a house before moving in like a professional.
We’ll provide a room-by-room checklist, pro hacks, and the exact order of operations to turn this big job into a series of manageable victories. Let’s get started.
Why a Pre-Move Deep Clean is Non-Negotiable
Walking into your new, empty home might feel like a blank canvas—but that canvas could be covered in the invisible dust, germs, and residue of the past. Here’s why investing time in how to deep clean a house before moving in is an absolute must.
1. Health First: You Don’t Know What You’re Inheriting
The previous occupants might have been tidy, but dust mites, pet dander, mold spores, and common allergens settle deep into carpets, vents, and corners.
Without a thorough clean, you’re inviting these irritants into your air from day one. A deep clean removes these triggers, creating a healthier environment—especially crucial for families with allergies, asthma, or small children.
2. True Disinfection: Surfaces Aren’t Always What They Seem
A “clean” countertop can harbor germs. Bathrooms and kitchens are hotspots for bacteria like E. coli and Salmonella. Wiping them down isn’t enough. A pre-move deep clean allows you to disinfect every surface properly—toilet bases, inside cabinets,—areas often missed during routine cleaning.
3. The One-Time Access Advantage
Once furniture and boxes are in, you’ll never have this level of access again. Those spots behind the toilet, under appliances, the top of cabinets, and the back of closets become nearly impossible to reach.
4. Uncover Hidden Issues
An empty house reveals secrets. As you clean, you might find:
Water damage under sinks
Mold growth in bathroom corners
Pest droppings in cabinets
Sticky residues or scratches on floors
5. A Psychological Fresh Start
Your home should feel yours from the moment you step in. Cleaning away the physical traces of previous residents helps claim the space emotionally.
There’s a powerful sense of comfort and ownership that comes from knowing every inch is sanitized and fresh.
6. Protect Your Belongings
Moving your clothes, dishes, and linens into dusty cabinets or a greasy oven range is counterproductive. A deep clean ensures your possessions are stored in a clean space, preventing cross-contamination and musty odors from day one.
Your Deep Clean Toolkit: Essentials to Gather First
Before you tackle the first dusty corner, the golden rule is this: the right tools transform an overwhelming chore into an efficient, satisfying process. Trying to deep clean without proper supplies is like trying to paint a room without a brush—you’ll waste time, effort, and likely miss the mark.
🛒 The Cleaning Arsenal: Supplies & Solutions
1. The Cleaners (The “Ammunition”):
All-Purpose Cleaner: For counters, cabinets, and most surfaces. Choose a degreasing formula for kitchens.
Disinfectant Spray or Wipes: Crucial for bathrooms, kitchens, and high-touch points like light switches and doorknobs.
Glass & Mirror Cleaner: For streak-free windows and mirrors.
2. The Tools (The “Infantry”):
Microfiber Cloths (Multiple Colors): The MVP of cleaning. Use different colors for different areas (e.g., blue for glass, yellow for kitchen, green for bathroom) to avoid cross-contamination.
Scrub Brushes: A sturdy brush for grout and tiles, and an old toothbrush for tight spots around faucets and appliance seals.
Extendable Duster: For reaching ceiling corners, fan blades, and the tops of cabinets.
🛡️ Protection & Extras
Rubber Gloves: Protect your hands from chemicals and hot water.
Safety Glasses & Mask: Essential when working with stronger cleaners, scrubbing overhead, or dealing with significant dust that can irritate eyes and lungs.
Caddy or Toolbox: Keep all your small supplies mobile. Walking back and forth to a central pile wastes precious energy.
Magic Eraser (Melamine Foam): A miracle worker on scuff marks on walls and doors.
📋 Pro-Tip: The “Stage Your Supplies” Strategy
Central Command: Place your bucket, mop, vacuum, and bulk supplies in a central location (like the hallway).
Mobile Unit: Load your caddy with the cleaners, cloths, brushes, and scrapers you’ll need for the current room. Take only what you need into that space.
The Strategic Order: How to Deep Clean a House Efficiently
Tackling an empty house can feel paralyzing. Do you start in the kitchen? Attack the bathroom? The secret to a fast, effective deep clean isn’t just hard work—it’s smart sequencing.
The Two Golden Rules of Cleaning Sequence
1. Top to Bottom Always, always start high and work your way down. . If you vacuum the floor first and then dust the ceiling fan, you’ll just have to vacuum again.
2. Dry to Wet Complete all dry cleaning methods (dusting, sweeping, vacuuming) before any wet cleaning (wiping, scrubbing). This prevents you from spreading damp dust and creating muddy streaks on surfaces or floors.
Your Step-by-Step Strategic Blueprint
Follow this exact flow in every single room for a flawless clean.
STEP 1: Overhead & Airborne (The “Top” in Top-to-Bottom)
Target: Ceilings, corners, light fixtures, ceiling fans, and the tops of doors/cabinets.
Action: Use your extendable duster to remove cobwebs and dust from ceilings and corners. Dust or wipe light fixtures and fan blades. Wipe down air vent covers.
STEP 2: Walls & Vertical Surfaces
Target: Walls, windows, blinds/shutters, mirrors, and cabinets.
Action: Wipe down walls and baseboards with a dry or slightly damp microfiber cloth to catch settled dust. Clean windows (glass, sills, and tracks), then blinds or shutters.
STEP 3: Furniture & Fixed Features (Dry)
Target: Built-in shelves, closet rods, empty cabinets/interiors, and any remaining fixtures.
Action: Vacuum the interiors of empty closets and cabinets. Wipe down all shelves and rods.
STEP 4: Detailed Wet Cleaning & Disinfection
Target: All surfaces requiring sprays, scrubbing, and disinfecting.
Action: Now, apply your cleaners. Scrub countertops, appliances, sinks, toilets, showers, and tubs. Disinfect high-touch points (switches, knobs, handles).
STEP 5: The Final Floor Finish
Target: Floors and floorboards.
Action: This is your last step in the room. First, vacuum thoroughly to pick up all the debris that has settled from the previous steps. Then, mop hard surfaces or use a carpet cleaner. This leaves you with a perfectly finished space.
Kitchen Deep Clean: Beyond the Counters
Phase 1: Overhead & The Grease Ceiling
Grease and dust rise, then settle on high surfaces. Start here.
Ceiling & Corners: Check for and remove any greasy cobwebs from corners and light fixtures.
Vent Hood Exterior & Filters: Wipe down the entire exterior. Remove metal grease filters and soak them in hot, soapy water (or a degreaser solution) for 20 minutes before scrubbing.
Top of Cabinets & Refrigerator: This is a major dust and grease trap. Wipe thoroughly with a damp, degreasing microfiber cloth.
Phase 2: The Cabinet & Drawer Overhaul (Inside-Out)
You’ll store your dishes and food here. They must be spotless.
Empty & Inspect: Remove any old shelf liners or debris.
Wipe Interiors: Using an all-purpose cleaner, wipe the interior of every cabinet and drawer—top, bottom, sides, and shelves. Pay special attention to corners.
Degrease Exteriors: Wipe down all cabinet and drawer fronts, including handles and knobs.
Phase 3: Appliance Deep Dive (The Big Moves)
This is the heavy lifting. It’s why you clean before moving furniture in.
Refrigerator:
Unplug if possible. Remove and wash all shelves and drawers in warm, soapy water.
Wipe the entire interior with a baking soda solution (2 tbsp baking soda per 1 quart water) to deodorize.
Oven & Range:
Use the self-cleaning cycle if functional, or apply a heavy-duty oven cleaner
Remove stove burners/grates and soak. Scrub the drip pans and stovetop.
Pull the stove out. Clean the sides, back, and the shocking amount of debris on the floor beneath it.
Dishwasher: Run a cleaning cycle with a dishwasher cleaner or a cup of white vinegar placed upright on the top rack.
Microwave: Heat a bowl of water with lemon slices for 3-5 minutes to steam-loosen grime, then wipe interior clean.
Phase 4: Sink & Countertops – The Sanitization Zone
Sink: Disinfect the entire basin. Scrub around the drain and overflow. For stainless steel, use a baking soda paste for shine.
Faucet & Sprayer: Descale with vinegar if needed. Clean where the base meets the counter—a common gunk collection point.
Countertops & Backsplash: Disinfect thoroughly. Use a degreaser on the backsplash, especially behind the stove.
Phase 5: The Final Touchpoints & Floor
Disinfect High-Touch Points: Light switches, appliance handles, cabinet knobs, and the trash can lid.
Final Floor Finish:
Sweep/Vacuum: Get all debris from under appliances and corners.
Mop with a Degreaser: Use a hot water solution with an all-purpose floor cleaner to cut through any lingering kitchen-floor grease.
✅ Pro Hack: The “Sticky Drawer” Fix
If drawers are sticky or slide poorly, wipe out the tracks and apply a small amount of cooking oil or paraffin wax to the glides for a smooth, like-new slide.
Bottom Line: A kitchen deep clean is about accessing the inaccessible. By going beyond the counters, you ensure your food, dishes, and family start fresh in a space that is hygienic and truly yours.
Bathroom Deep Clean: The Sanitization Station
Phase 1: Overhead & Ventilation
Start high where moisture and mildew collect.
Ceiling & Corners: Inspect for mold or mildew spots, especially over the shower. Treat with a bleach-based cleaner or distilled white vinegar (for porous ceilings).
Exhaust Fan: Remove the cover and wash it in soapy water. Wipe the interior of the housing with a damp cloth.
Phase 2: Walls, Mirrors & Surfaces
Tackle vertical surfaces before deep scrubbing.
Walls & Tile: Wipe down all walls, paying close attention to tile surrounds. This is a dry removal of surface dust and hair before wet cleaning.
Mirror & Medicine Cabinet: Clean the mirror with glass cleaner. Empty and wipe the interior of the medicine cabinet—discard any old items.
Phase 3: The Deep Sanitization Scrub
This is the core mission. Gear up with gloves.
🛁 Shower/Tub Area:
Showerhead: Descale by placing a plastic bag filled with vinegar over it, securing with a rubber band. Soak for an hour, then scrub.
Tile & Grout: Apply a dedicated bathroom scrub or a baking soda paste to grout lines. Use a grout brush or old toothbrush to scrub. For mold, a 1:1 bleach/water spray (ventilate well!) can be used.
Shower Doors/Curtain: Scrub doors with a squeegee after cleaning. Remove the shower curtain liner and wash it, or replace it.
🚽 Toilet (The Total Takeover):
Interior: Apply bowl cleaner under the rim and let it sit. Scrub thoroughly with a dedicated toilet brush.
Exterior: Disinfect the entire exterior—tank, lid (top and bottom), seat (top and bottom), handle, and most critically, the base and the bolts.
🚰 Sink & Vanity:
Basin & Faucet: Disinfect the sink. Polish the faucet and clean the aerator if possible. Scrub around the base where it meets the counter.
Drain & Stopper: Remove any hair/debris from the drain. Clean the pop-up stopper.
Vanity Interior: Wipe out all cabinets and drawers. Line with fresh paper if desired.
Phase 4: Fixtures & High-Touch Points
Disinfect Everything You Touch: Towel bars, toilet paper holder, door knobs, light switches, and drawer pulls.
Waste Bin: Empty, disinfect inside and out, and place a fresh liner.
Phase 5: The Final Floor Finish
Sweep/Vacuum: Remove all hair, dust, and debris from the floor, especially corners.
Mop with Disinfectant: Use a disinfecting cleaner or a dilute bleach solution (follow label directions) on the floor. Pay extra attention to the area around the toilet base—mop last and discard the water.
✅ Pro Hack: The Pumice Stone Power
For stubborn, non-porcelain mineral rings in the toilet bowl, a pumice stone dipped in water is a safe, effective scrubber that requires no harsh chemicals.
Living Areas & Bedrooms: Conquering Dust and Allergens
While kitchens and bathrooms battle grease and germs, living areas and bedrooms face a different, pervasive enemy: dust. This deep clean is your strategic assault on settled allergens, pet dander, and dust mites to create a truly breathable space.
Phase 1: The Overhead Offensive
Dust settles from above. Start your attack there.
Ceilings & Corners: Use an extendable duster to remove every cobweb from corners and along ceiling edges.
Ceiling Fans & Light Fixtures: For fans: Place a pillowcase over each blade and pull it toward you, trapping dust inside. Wipe the fixture body. Clean light fixtures and bulbs (cooled) with a damp cloth.
Phase 2: Walls & Window Warfare
Capture dust on vertical surfaces before it hits the floor.
Walls & Baseboards: Wipe down walls with a dry electrostatic duster or a damp microfiber cloth to capture dust, paying special attention to baseboards—a major dust magnet.
Windows: Clean the glass inside. Vacuum window tracks thoroughly with a crevice tool, then wipe with a damp cloth to remove embedded grit.
Blinds & Shutters: Dust vinyl blinds with a microfiber cloth. For wooden shutters, use a gentle wood cleaner. Vacuum fabric shades.
Phase 3: Built-Ins & Storage (The Empty Advantage)
This is your one chance to clean these spaces completely empty.
Closet Interiors: Vacuum the floor and every shelf. Wipe down all walls, shelves, rods, and corners inside closets. A clean closet prevents musty smells on your clothes.
Doors & Frames: Wipe down both sides of doors, door frames, and all switch plates—high-touch dust collectors.
Phase 4: The Final Floor Conquest
Now that all above-surface dust has been forced downward, finish the job.
Vacuum Thoroughly: Use the appropriate attachments. Go slowly over carpets in multiple directions to lift embedded dust. Vacuum hard floors to pick up all debris.
Carpets: For a true fresh start, rent a steam cleaner or hire a professional service. This extracts deep-down allergens and residues you can’t reach with a vacuum.
✅ Pro Hack: The “Two-Pass” Dusting Method
Dry Pass: Use a microfiber duster to lift and trap loose dust.
Damp Pass: Go over surfaces with a slightly damp microfiber cloth to capture any remaining, sticky dust particles. This ensures nothing is simply redistributed into the air.
Bottom Line: Conquering dust in living areas is about systematic removal, not displacement. By working top-to-bottom and leveraging the empty space, you’re not just cleaning surfaces—you’re actively improving the air quality of your new home, making this a vital step in your pre-move deep clean.
Often-Forgotten Spots: The Secret to a Truly Deep Clean
You’ve scrubbed the showers and vacuumed the floors, but the real hallmark of a professional-grade deep clean before moving in lies in tackling the hidden, neglected areas that most people never see.
The “Invisible” High-Touch Areas
These surfaces are touched constantly but cleaned rarely.
Light Switches & Plate Covers: Use a disinfecting wipe on every single switch and plate in the house. Grime builds up here.
Door Handles, Knobs, & Pulls: Don’t forget closet doors, cabinet handles, and the back door handle.
Thermostat & Intercom Panels: Gently wipe down with a dry or slightly damp cloth.
Behind & Under: The Out-of-Sight, Out-of-Mind Zones
The empty house gives you temporary access—use it.
Behind the Toilet Tank: Slide your hand and a cloth into the narrow gap between the tank and the wall. You’ll likely find dust bunnies and worse.
Under the Kitchen/Bathroom Sink Rims: Where the faucet base meets the countertop. Run a toothbrush or rag around this seal to remove gunk.
Ventilation & Utility Hideaways
These circulate air and house essentials—keep them clean.
Air Vent & Return Duct Covers: Remove and wash in soapy water. Vacuum as far into the ducts as the hose will reach.
Behind the Dryer: Pull the dryer out. Vacuum the lent trap area, the floor, and the wall. This is a major fire hazard if neglected.
Washing Machine Gasket & Dispensers: Run an empty hot wash cycle with vinegar or a washer cleaner. Wipe clean the rubber door gasket (mold central) and detergent/bleach dispensers.
Window & Door Details
Light enters here, and so does dust.
Window Tracks & Sills: Vacuum tracks first, then scrub with a brush and soapy water. A toothbrush gets the corners. Wipe sills dry.
Sliding Door Tracks: Same intensive treatment as windows—vacuum, scrub, wipe.
Final Walk-Through Checks
Do a slow, deliberate scan of each room looking only at:
Baseboard Heaters: Vacuum fins and wipe surfaces.
Closet Floor Corners: The very back corners often hold debris.
Stair Risers & Spindles: Wipe down each one.
Garage Floor & Entryway Threshold: Sweep and hose down or mop. It sets the tone.
✅ Pro Hack: The Flashlight Inspection
After you think you’re done, take a bright flashlight and shine it parallel to surfaces—floors, counters, shower walls.
Bottom Line: Attending to these often-forgotten spots is what separates a surface clean from a transformative deep clean.
Pro Cleaning Hacks for Stubborn Problems
1. Grimy, Discolored Grout
The Problem: Shower or kitchen tile grout is dark, stained, or moldy. The Pro Hack: Hydrogen Peroxide & Baking Soda Paste.
Mix hydrogen peroxide (3%) with enough baking soda to form a thick paste.
Apply it directly to the grout lines with an old toothbrush or grout brush.
Let it sit and fizz for 15-30 minutes to lift stains and kill mildew.
2. Hard Water Stains on Faucets & Showerheads
The Problem: Chalky white or crusty mineral deposits on chrome and metal fixtures. The Pro Hack: The Vinegar Soak Bag.
Fill a plastic bag with white vinegar.
Submerge the showerhead or faucet in the bag, ensuring it’s fully covered.
Secure the bag tightly around the fixture with a rubber band or zip tie.
Let it soak for at least 1 hour (or overnight for heavy buildup).
Remove, scrub lightly with an old toothbrush, and run water to flush.
3. Sticky Residue & Left-Behind Labels
The Problem: Gummy adhesive from old labels, tape, or shelf liners on glass, cabinets, or floors. The Pro Hack: Rubbing Alcohol or Oil.
For non-porous surfaces (glass, metal): Soak a cloth with rubbing alcohol (isopropyl alcohol) and hold it on the residue for 30 seconds. It will dissolve the adhesive, allowing you to wipe it clean.
For porous surfaces (wood, laminate): Use a cooking oil (like coconut or olive oil). Let it sit on the residue for 10 minutes to break down the glue, then wipe away with a cloth. Follow with dish soap to remove the oil.
4. Lingering Musty or Pet Odors
The Problem: A persistent, unpleasant smell in closets, basements, or carpets. The Pro Hack: The Baking Soda Air Purge.
For enclosed spaces (closets, cabinets): Place an open box of baking soda inside. It will passively absorb odors for weeks.
For whole rooms or carpets: Liberally sprinkle baking soda over carpets, upholstered furniture left behind, or floors. Let it sit for several hours or overnight to absorb deep-seated odors, then vacuum thoroughly.
5. Scuff Marks & Light Scratches on Floors/Walls
The Problem: Black heel marks on vinyl or laminate, and scuffs on painted walls. The Pro Hack: The Magic Eraser (Melamine Foam).
Dampen the Magic Eraser with water and wring it out well.
Gently rub the scuff mark using light pressure. No cleaner is needed.
Wipe the area with a clean, damp cloth to remove any residue.
Your Final Move-In Victory
Addressing these final details ensures your deep clean before moving in is comprehensive and triumphant, leaving you with nothing but the pure excitement of a fresh start.
Conclusion
You did it. You’ve transformed an empty house—with all its hidden history, dust, and grime—into a truly clean, sanitized, and fresh space. This wasn’t just about cleaning; it was about claiming your new beginning on the healthiest, most positive terms possible.
By following this guide on how to deep clean a house before moving in, you’ve accomplished something profound: you’ve ensured that the first breath your family takes, the first meal you prepare, and the first night you sleep in your new home will happen in an environment you can trust.
Your Next Steps & How We Can Help
📌 Save Your Success: Bookmark or pin this ultimate checklist to your “Home” or “Moving” board. You’ll be glad you have it for future spring cleans or when a friend needs help!
💬 Become a Community Pro: What was your biggest “win” or most stubborn problem during your pre-move clean? Share your story, hack, or before-and-after photo in the comments below.
Welcome home. Now go enjoy it. 🏡
FAQs
How long before moving day should I do the deep clean?
Ideally, schedule the deep clean 1-2 days before your move-in date. This ensures the house is still empty for full access but is fresh and ready when you arrive with your belongings. If you’re cleaning the home you’re moving out of, do it after all your furniture is out but before the final walk-through.
Do I need to use harsh chemical cleaners for a proper deep clean?
No, you don’t. While disinfectants are important for bathrooms and kitchens, many effective solutions are natural. A combination of white vinegar, baking soda, hydrogen peroxide, and dish soap can tackle most grease, grime, and mildew. Always ensure proper ventilation regardless of the cleaners you choose.
Does your weekly wipe-down leave a lingering film of grime? Do you find yourself spraying and scrubbing, only to see streaks and stains stubbornly clinging to surfaces? You’re not alone. The secret weapon professional cleaners and savvy homeowners rely on isn’t a fancy, expensive product with a long chemical name. It’s something simpler, more versatile,…
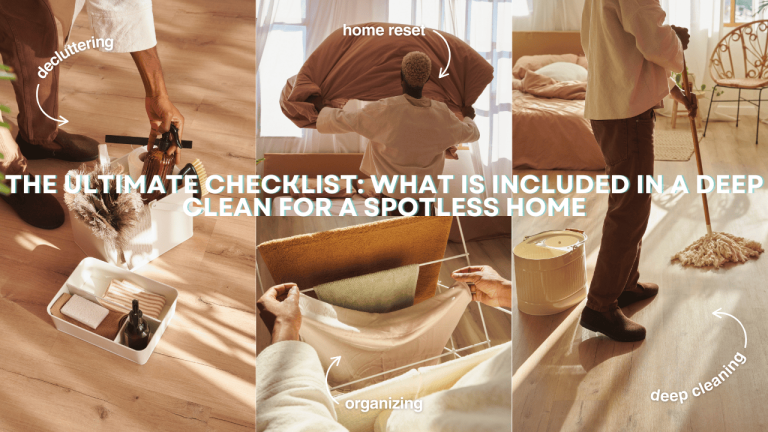
Is your regular cleaning routine leaving you feeling like something’s… still dirty? You wipe down counters, vacuum carpets, and tidy up, yet a layer of grime seems to linger in corners, on baseboards, and behind appliances. We’ll move beyond surface cleaning to target the hidden dirt and often-neglected spots that truly define a deep clean.By…
You know the feeling. You walk into a room—maybe your living room after a busy week, or a bedroom that’s become a catch-all—and it just feels…heavy. That’s because there’s a world of difference between a surface tidy and a true deep clean. A deep clean isn’t about quick fixes; it’s a systematic reset. It targets the hidden grime…